This guide is designed to take you through setting up the Toshiba ST-B10 EPOS hardware that you will be using with your SellerDeck EPOS software.
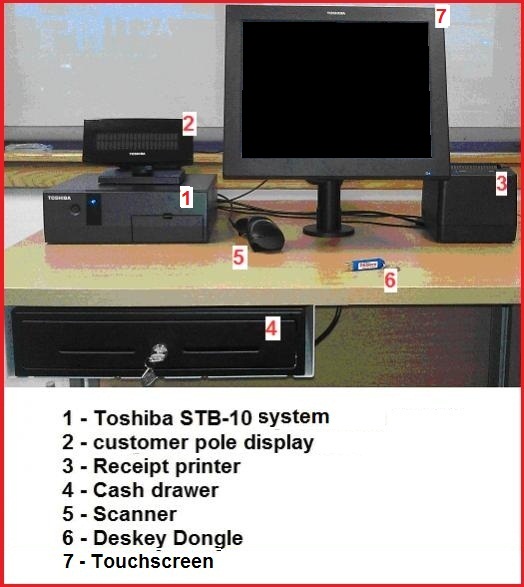
You should have the items shown in the following picture:
Please see instructions below:
The system should now be ready to work out of the box, but if you find it doesn't, see instructions to configure the hardware here:
http://community.sellerdeck.com/showthread.php?t=50458
You should have the items shown in the following picture:
Please see instructions below:
- Plug the Blue Deskey dongle into any USB port on the back of the STB-10 unit:
- At this point you can also plug in the scanner into any USB port.
- Plug the cable from the pole display into the port marked �Com 4� on the back of the STB-10 unit.
- Now to the back of your receipt printer, first plug in the power cable.
- Next, cable the small connector from the back of the cash drawer, and plug it into the back of the receipt printer. (See below)
- Next, plug the small end of the serial cable you have into the back of the receipt printer.
- Next, plug the larger 25 pin end of the serial cable, into the port marked �COM 1� on the back of the STB-10 system.
- Plug the power cable from the receipt printer, into the port marked �USB / 24V� on the back of the STB-10 system. (See below)
- Finally, plug the cable from the touch screen, into the port marked �LVDS� on the back of the STB-10 unit.
The system should now be ready to work out of the box, but if you find it doesn't, see instructions to configure the hardware here:
http://community.sellerdeck.com/showthread.php?t=50458