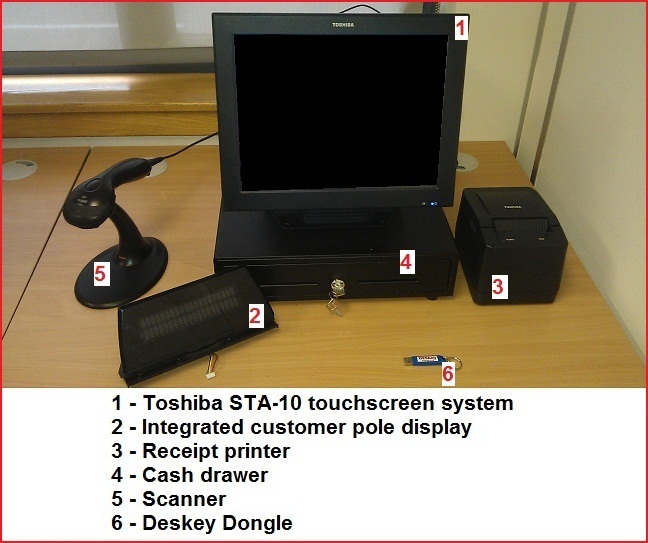
This guide is designed to take you through setting up the Toshiba ST-A10 EPOS hardware that you will be using with your SellerDeck EPOS software.
You should have the items shown in the following picture:

Please see instructions below:
Congratulations, you have set up your own SellerDeck Toshiba ST-A10 EPOS system!
The system should now be ready to work out of the box, but if you find it doesn't, see instructions to configure the hardware here:
http://community.sellerdeck.com/showthread.php?t=50780
You should have the items shown in the following picture:
Please see instructions below:
- In your Toshiba ST-A10 tower, look underneath the screen, you should find USB ports. Insert the Blue Deskey Dongle as follows:
- At this point you can also plug in the scanner, as there are multiple USB ports.
- On the top of your tower should be a small port for a cable, this is where your customer pole display will be going, as follows:
Once that has been plugged in, you can slide the pole display onto the top, which will lock it in place.
- Now to the back of your receipt printer, once you have plugged in the power input, you will have 2 cables to plug in.
- On the left hand side of your tower, there are COM ports, which COM port you choose to plug the printer in is crucial to your software setup. In this example we have used COM1.
Congratulations, you have set up your own SellerDeck Toshiba ST-A10 EPOS system!
The system should now be ready to work out of the box, but if you find it doesn't, see instructions to configure the hardware here:
http://community.sellerdeck.com/showthread.php?t=50780