The instructions below explain how to configure the Epson TM-T88IV / TM-T88III printer to work with SellerDeck EPOS.
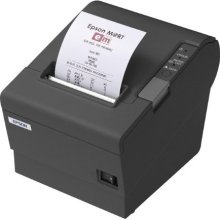
These instructions will also work with many other brands of printers as long as they are Epson OPOS compatible, or emulate an Epson printer (In the user manual of the printer, it will tell you this information). Some brands of printer will require additional drivers in order for the printer to work with Epson OPOS, you should contact the manufacture to investigate this.
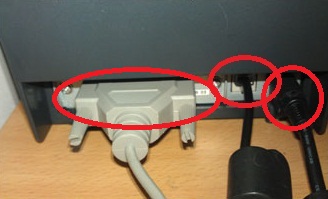
1) First, Plug the wider 25 pin end of the serial cable into the back of the printer. (Image below)
2) Plug the other smaller end of the serial cable into one of the Com ports on your computer.
3) Plug the Printers power pack into the round connection on the back of the printer.
4) If you have a cash drawer, find the small connector which comes out of the back of the cash drawer, plug this small connector into the back of your receipt printer.
How to configure the Epson TM-T88IV / TM-T88III printer:
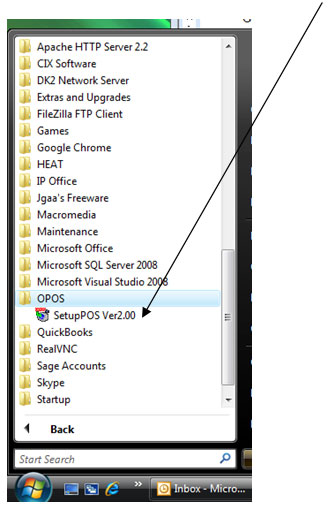
1) Go to Start | Programs | OPOS | SetupPOS Ver2.00
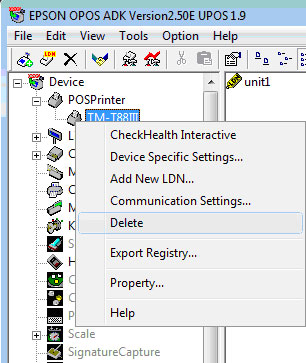
2) Expand the list of devices on the left, then expand "POSPrinter".
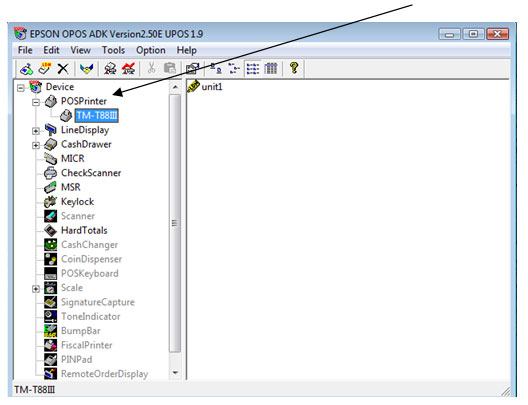
3) Delete "TM-T88III" from the list of devices.
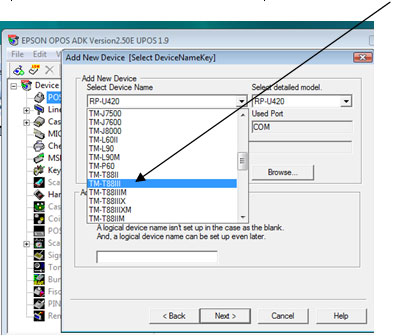
4) Right click on �POSPrinter� and select �add new device�

5) In the �Select Device name� drop down list select the Epson printer you are using.
6) In �Add new LDN� type �unit1�
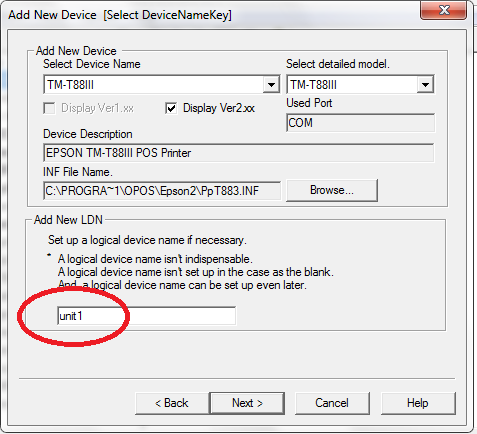
7) Click �Next�
8) Under "Com Port settings" you need to select the correct Com Port the printer is plugged into on your PC. You can come back and change this if the test does not work later on. Click here to check what COM ports you have avalible on your PC.
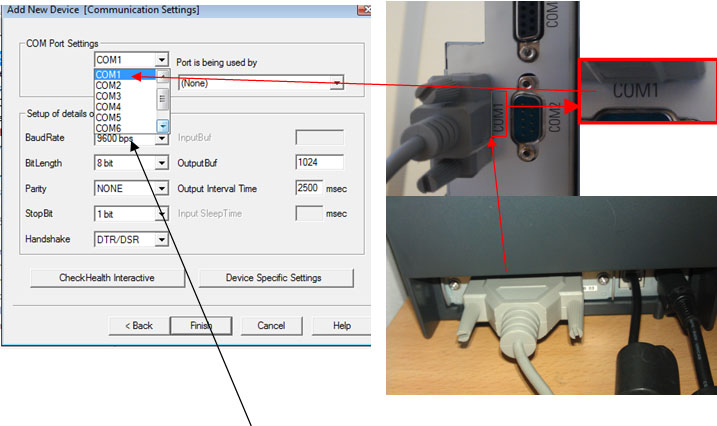
9) Next you�ll need to check the Baud rate of your new printer. To check the baud rate, turn the printer off. Then, hold down the "Feed" button on the printer and switch it back on, whilst still holding down the feed button. When you now let go of the feed button the printer will print a diagnostic report. On the report you will see what baud rate the printer uses. Select this baud rate in the drop down list.
10) Click "Finish"
You can test if you have selected the correct port and Baud rate by clicking "Checkhealth Interactive", then click "Start", it will then print a test message. If it does, you�re done!
Click here to begin Setting up the Cash Drawer
These instructions will also work with many other brands of printers as long as they are Epson OPOS compatible, or emulate an Epson printer (In the user manual of the printer, it will tell you this information). Some brands of printer will require additional drivers in order for the printer to work with Epson OPOS, you should contact the manufacture to investigate this.
1) First, Plug the wider 25 pin end of the serial cable into the back of the printer. (Image below)
2) Plug the other smaller end of the serial cable into one of the Com ports on your computer.
3) Plug the Printers power pack into the round connection on the back of the printer.
4) If you have a cash drawer, find the small connector which comes out of the back of the cash drawer, plug this small connector into the back of your receipt printer.
How to configure the Epson TM-T88IV / TM-T88III printer:
1) Go to Start | Programs | OPOS | SetupPOS Ver2.00
2) Expand the list of devices on the left, then expand "POSPrinter".
3) Delete "TM-T88III" from the list of devices.
4) Right click on �POSPrinter� and select �add new device�
5) In the �Select Device name� drop down list select the Epson printer you are using.
6) In �Add new LDN� type �unit1�
7) Click �Next�
8) Under "Com Port settings" you need to select the correct Com Port the printer is plugged into on your PC. You can come back and change this if the test does not work later on. Click here to check what COM ports you have avalible on your PC.
9) Next you�ll need to check the Baud rate of your new printer. To check the baud rate, turn the printer off. Then, hold down the "Feed" button on the printer and switch it back on, whilst still holding down the feed button. When you now let go of the feed button the printer will print a diagnostic report. On the report you will see what baud rate the printer uses. Select this baud rate in the drop down list.
10) Click "Finish"
You can test if you have selected the correct port and Baud rate by clicking "Checkhealth Interactive", then click "Start", it will then print a test message. If it does, you�re done!
Click here to begin Setting up the Cash Drawer