To use a USB Epson TM-T88IV receipt printer please follow the steps below.
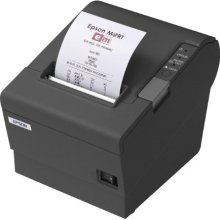
These instructions will also work with any USB Epson receipt printer:
This printer should now work ok with SellerDeck EPOS.
If the printer still does not work, you may need to check the dip switch settings of the printer, to ensure it has been configured to run in USB mode, see below:
Now, you can setup your cash drawer to work with SellerDeck EPOS, which is plugs into the back of the USB Epson printer. See instructions below:
Note: If the USB printer does not work after following the steps above, you may need to remove the USB printer from Control Panel | "Devices and Printers" / "Printers and Faxes" on your PC.
Note: Before testing the cashdrawer within Epson OPOS, you need to make sure SellerDeck EPOS is not open on the sales screen
These instructions will also work with any USB Epson receipt printer:
- Go to Start | Programs | Opos | SetupPOS Ver2.00
- Expand the list of devices on the left, then expand "POSPrinter".
- Right click on "TM-T88II" if it exists and select "Delete"
- Right click on �POSPrinter� and select �add new device�
- In the �Select Device name� drop down list select "TM-T88III"
- In "Select details model" select "TM-T88IIIU"
- In �Add new LDN� type �unit1�
- Click �Next�
- Under USB port, select the USB port the printer is plugged into.
- At this stage you can click "CheckHealth interactive" to see if the correct USB port is selected.
- Click finish
This printer should now work ok with SellerDeck EPOS.
If the printer still does not work, you may need to check the dip switch settings of the printer, to ensure it has been configured to run in USB mode, see below:
- Turn off your Epson TM-T88IV receipt printer.
- Then Turn your Epson TM-T88iv over, printer face down and you should see a silver access panel underneath
- Unscrew this access panel and your will see two banks of Dip switches [DSW1] and [DSW2].
- Looking at [DSW1] Dip switch 7, this should be set in the "On" position (Down). This needs to be changed to the "Off" position (Up) and dip switch 8 needs to be set to "On" (Down) position.
- Once this is done replace the panel and return the device to its upright position and power the device back on.
Now, you can setup your cash drawer to work with SellerDeck EPOS, which is plugs into the back of the USB Epson printer. See instructions below:
- Go to Start | Programs | Opos | SetupPOS Ver2.00
- Expand the list of devices on the left, then expand "CashDrawer".
- Right click on "Standard" if it exists and select "Delete"
- Right click on �CashDrawer� and select �add new device�
- In the �Select Device name� drop down list select "Standard"
- In "Select details model" select "StandardU"
- In �Add new LDN� type �unit1�
- Click �Next�
- Under USB port, select the USB port the printer is plugged into (Same USB Port as earlier in this article.
- At this stage you can click "CheckHealth interactive" to see if the correct USB port is selected.
- Click finish
Note: If the USB printer does not work after following the steps above, you may need to remove the USB printer from Control Panel | "Devices and Printers" / "Printers and Faxes" on your PC.
Note: Before testing the cashdrawer within Epson OPOS, you need to make sure SellerDeck EPOS is not open on the sales screen