The instructions below explain how to configure a standard cash drawer to work with SellerDeck EPOS.
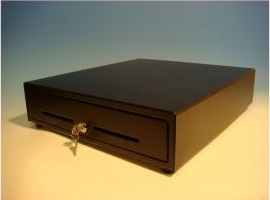
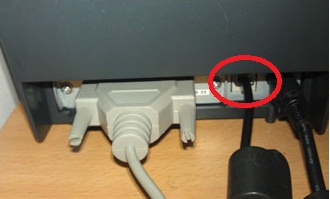
First, find the small connector which comes out of the back of the cash drawer, plug this small connector into the back of your receipt printer. (See below)
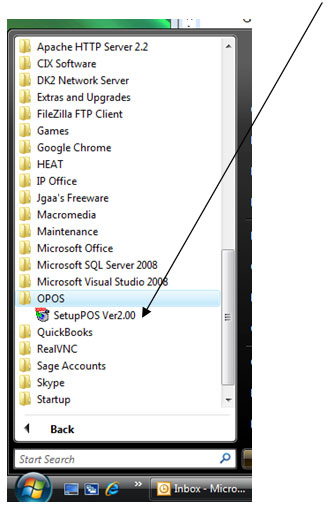
1) On your PC, go to Start | Programs | OPOS | Setup POS Ver2.00
2) Expand the list of devices on the left, then expand "CashDrawer".
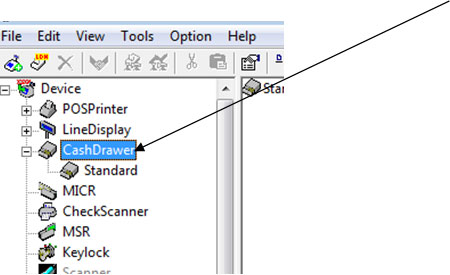
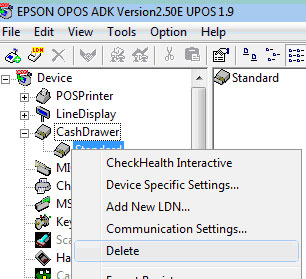
3) Delete "Standard" from the list of devices.
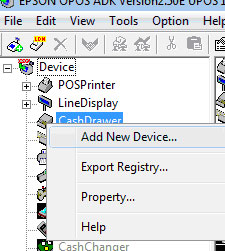
4) Right click on “CashDrawer” and select “add new device”
5) In the “Select Device name” drop down list select “Standard”.
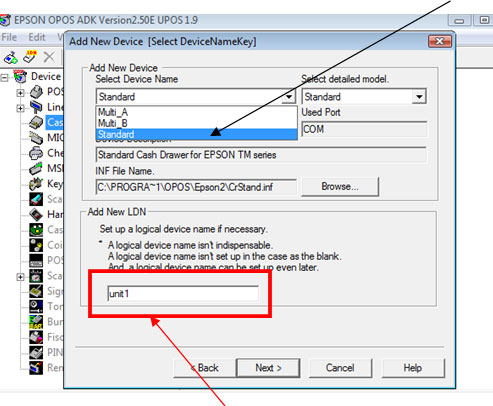
6) In “Add new LDN” type “unit1”
7) Click “Next”
8) Under "Com Port settings" you need to select the correct Com Port the printer is plugged into on your PC. You can come back and change this if the test does not work later on. (see step 8 of Epson Printer setup)
9) Open the cash drawer by going into SellerDeck EPOS, go to the sales screen. Click Menu (or press F10) Double-click Z Read, and click the cash drawer, if you have set it up correctly, it should pop open.
Instructions for setting up the Epson TM-T88IV / TM-T88III receipt printer can be found here.
First, find the small connector which comes out of the back of the cash drawer, plug this small connector into the back of your receipt printer. (See below)
1) On your PC, go to Start | Programs | OPOS | Setup POS Ver2.00
2) Expand the list of devices on the left, then expand "CashDrawer".
3) Delete "Standard" from the list of devices.
4) Right click on “CashDrawer” and select “add new device”
5) In the “Select Device name” drop down list select “Standard”.
6) In “Add new LDN” type “unit1”
7) Click “Next”
8) Under "Com Port settings" you need to select the correct Com Port the printer is plugged into on your PC. You can come back and change this if the test does not work later on. (see step 8 of Epson Printer setup)
9) Open the cash drawer by going into SellerDeck EPOS, go to the sales screen. Click Menu (or press F10) Double-click Z Read, and click the cash drawer, if you have set it up correctly, it should pop open.
Instructions for setting up the Epson TM-T88IV / TM-T88III receipt printer can be found here.